Coleman Technologies Blog

Coleman Technologies Blog

We can give your organization comprehensive IT services and 24/7/365 live support for a predictable monthly fee. Stop stressing about technology, and start focusing on growing your business.

Tip of the Week: How an Android User Can FaceTime, Sort Of

Tip of the Week: How an Android User Can FaceTime, Sort Of

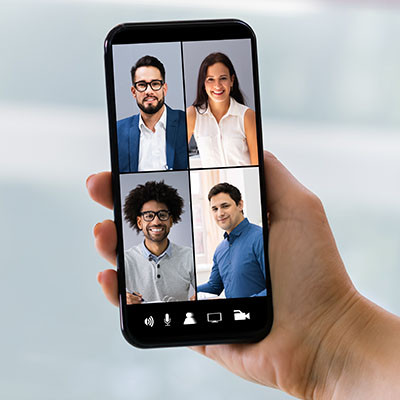
When it comes to exclusive user features, one of the better-known ones on the Apple side of the house is FaceTime, a video chat platform. Apple has however made certain features of FaceTime available to Android users, but they come with a catch. Let’s go over how an iPhone user can FaceTime with an Android user, even if some of the features are not quite there.

0 Comments
Continue reading

Tip of the Week: How to Clear Your Browser Cache in Android OS

Tip of the Week: How to Clear Your Browser Cache in Android OS

Anyone who wants to prioritize their privacy should be aware of the role the cache plays in such a thing. Your Google web browser—even on your smartphone—will store information about what you search so it can personalize your ads and recommendations, but if you would rather not have it do this all the time, you can clear your Android device’s Google search cache and set it up to auto-delete after a set amount of time has passed.

0 Comments
Continue reading

How to Go Back and Look at Your Android Notifications

How to Go Back and Look at Your Android Notifications

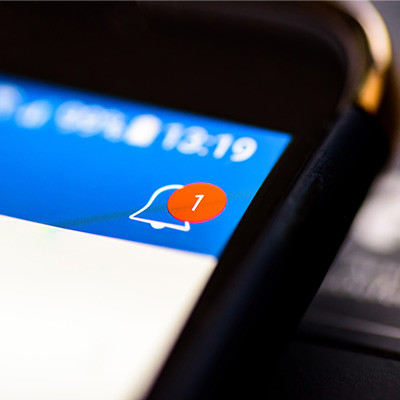
Have you ever cleared a notification on your phone, then gotten a sinking feeling a couple hours later, like you’ve missed something important? Well, worry no longer, for we will show you how to turn on your Android smartphone’s notification history feature. This should alleviate at least some of the stress you might experience about clearing notifications.

0 Comments
Continue reading

Tip of the Week: Simple Solutions to a Few Android Problems

Screen Rotating Too Much? Lock It in Place!

How often have you been in the middle of doing something, only to shift your phone’s position and have your screen switch orientation as it calibrates to what it assumes is what you are looking for? It doesn’t take long for this to get old, and quick.

0 Comments
Continue reading

What’s the Best Way to Secure Your Mobile Device?

Why Mobile Security is So Important in the First Place

Consider the capabilities of our mobile devices today, as compared to those that were considered high-end before Apple premiered the iPhone in 2007 (Not to discredit all the classic PDA/smartphones that came before the iPhone, like the Palm Trio, the Blackberry, and the line of super cool HTC Windows phones, but general consensus feels that the big shift in mobile computing really started with Apple). The difference is staggering. While those devices that are affectionately referred to as “dumb phones” certainly can contain sensitive data, it is effectively nothing compared to what a smartphone can access.

0 Comments
Continue reading

Verified Business SMS Added to Messages

Most users that have an Android device use the Messages application to send and receive SMS messages. Companies that use this platform for marketing could have their messages routinely ignored because people don’t trust the content that comes from seemingly random numbers. 

With verified SMS, however, every message that is sent to a prospect or customer is verified to actually come from the company. In fact, the recipient won’t even receive the message until it is verified. The content is transmitted with the business’ name, logo, and confirmed with a verification badge. Google has stated that the content is never revealed to them, meaning that the content is secure and sent privately like any other text message.

How Do You Turn on Verified SMS?

Obviously, you need to have a device that runs a recent version of Android mobile OS. To turn on Verified SMS:

  • Open the stock Android Messages app
  • In the three-dot menu, access your Settings
  • Access Verified SMS
  • Switch on Verify business message sender 

Now you don’t have to waste time with unverified marketing or sales content. 

For more great tips, visit our blog regularly.

0 Comments
Continue reading

Tip of the Week: How to Restore Your Android Apps and Settings

Even if you aren’t planning on replacing your phone soon, it may make sense to pay attention here, as this process will also make it easier to restore your data to a new phone if needed. Either way, this process is much easier if you make some proactive preparations on your current phone.

Enabling the Native Android Backup Capabilities 

The first step is to make sure that your current phone has the backup service running. It can be found in your Settings, under System. Tap the Backup option, and check to see that the option to Back up to Google Drive is selected. If it isn’t, do so.

Now you have a copy of your current phone’s configuration to restore from, which you can do from the initial configuration of your new device. If you were using the Google Now or Pixel Launcher, even your backgrounds, icons, and folder structure is saved.

During setup, hit the Let’s Go button that appears at the welcome screen. Tap Copy your data, and connect to Wi-Fi.

Now, you’ll be presented with your restoration options. Since we just went over how to save a backup in the cloud, let go with the option to use A backup from the cloud. You’ll be prompted to sign into your Google account, and to agree to Google’s Terms of Service.

From the list of backup options, select the correct one. You can easily hit Restore to recover all of your previous device’s settings and data, and can select which apps to reinstall via Apps.

As your data is pulled over, you will be guided through the rest of the setup process.

Voila! Your new phone is now equipped with your selected tools and settings, ready for you to jump right back in. For more handy tips, make sure you subscribe to our blog!

0 Comments
Continue reading

The Latest Android Malware is Almost Impossible to Remove

Meet xHelper, The Malware That Refuses to Go Away

As of right now, it is suspected that xHelper has infected around 50,000 devices, which is a big number, but relatively low when it comes to malware of this type. The big names in cybersecurity, Symantec, Malwarebytes, and the like, don’t have any clear answers on how to actually remove the threat. If that’s not enough, deleting everything on your smartphone and doing a factory-reset won’t remove the malware either. Once you set your device back up, the threat will be back.

What Does xHelper Do?

We have good news and some bad news. The good news is that right now, it seems that xHelper just gives you annoying pop-up spam and notifications. It’s goal? To get you to install more applications, and likely these applications could come with additional threats.

It is also suspected that xHelper can download and install apps on its own. It hasn’t been officially detected doing this in the wild yet, but if it could do that, then you would essentially lose control over your device.

Don’t Forget, You Can’t Get Rid of xHelper Once You Get It

As of right now, there is no way to uninstall xHelper, and even resetting your device to factory settings keeps the malware installed. There is essentially no help for you other than getting a new phone, or waiting for Google or one of the major players in cybersecurity to figure out a way to remove it. This could take a while…

For Now, All You Can Do is Avoid Getting xHelper

The malware seems to get installed from scammy websites. The app isn’t found on the Google Play Store (at least at the time of writing this). Only install apps from the Google Play Store, and never from any other website. Google has a vetting process that keeps most apps on the Google Play Store relatively safe (it’s not a perfect system, but it does weed out most of the danger).

When it comes to cybersecurity, the best place to get started is being aware of the threats and employing safe habits. That, and ensuring that your business data is thoroughly protected. Don’t wait for a problem to happen, give Coleman Technologies a call at (604) 513-9428 today.

0 Comments
Continue reading

Tip of the Week: Enabling Smart Compose on Gmail for Android

Those familiar with the online version of Gmail will find all of this quite familiar, as Smart Compose has been predicting their next words for some time now. It will seem newer to those more familiar with the Gmail application in macOS and Windows, as it hasn’t been available there until now. 

Using Smart Compose on Android Devices

The first thing you’ll have to have in order to use Smart Compose is an active Google account, with the latest version of the Gmail application installed on your chosen device. As you type, Smart Compose will present its predictive text suggestions that a user can either accept, or just keep typing to ignore. While this form of machine learning is pretty basic, it does demonstrate how a device can “learn” how a user is most likely to use it - in this case, what word is likely to come next in the user’s sentence.

Turning Smart Compose Off (and On Again)

Of course, some users may find these suggestions inconvenient or distracting. That’s totally fair, and means that these users should deactivate the Smart Compose feature. Access the Gmail app’s menu by pressing the hamburger icon at the top left. You should see your Settings from there. You will be asked to choose from the accounts that have access to your device. Once you’ve selected the appropriate account, look under General settings to find Smart Compose. Use the toggle switch to activate it or deactivate it as you please.

While Smart Compose may not be quite as impressive as the artificial intelligence that appears in feature films, it has one major advantage over them: it can actually be used to benefit your business. For other ways that you can give your business operations a boost through technology solutions and tips, subscribe to our blog! You can also reach out to us directly by calling (604) 513-9428.

0 Comments
Continue reading

Tip of the Week: 9.0 Pie Brings with It New Features

New Gestures
The latest version of Android OS contains a built-in new gesture navigation system, but it might not be turned on automatically. To turn this on, go to Settings > System > Gestures. Then you must tap on Swipe on Home Button and press the on-screen toggle switch. You will see the change propagate almost immediately--the three-icon setup will change to a singular pill-shaped icon.

Navigation isn’t much different from the other builds, either. Tap the pill icon to bring back the homescreen and long press it to bring up your Google Assistant. You can then swipe up twice or long-swipe from the home icon to bring up your app drawer.

Another change that needed to occur is that Android 9.0 Pie removes the dedicated button for recent applications. Users now need to singular short swipe up from the bottom of the screen to open up a carousel gallery that shows all recently opened apps. You can then navigate by swiping between apps or using the home icon to swipe fast-left or right to move through the apps more quickly. To clear the apps, swipe up on the specific app window. To clear all of the apps, just scroll all the way to the left and tap the Clear All button to exit out of all running applications.

Android 9.0 Pie actually tries to predict what you’re likely to need next. These commands are within the apps. If you find it useful, you can drag these suggestions, found at the top of your app drawer, onto the screen. You can then find the shortcuts offered by each app by long-pressing the specific application’s icon. This includes opening an application in split-screen mode, a considerable improvement from Android 8.0 Oreo.

Device Notes
One extremely useful feature for smartphone users is the ability to open your device using a fingerprint scanner, but an even better one is when you can use the scanner on devices that don’t feature an in-display fingerprint reader to keep your screen from turning off.

The alarm clock in Android 9.0 provides some additional functionality. When your notification panel is open (swipe down from the top), you only need to tap on the clock in the system tray to open your clock app and manage the alarms.

What do you think about Android 9.0? What are your favorite features? Let us know in the comments.

0 Comments
Continue reading

About Coleman Technologies

Coleman Technologies has been serving the British Columbia area since 1999, providing IT Support such as technical helpdesk support, computer support and consulting to small and medium-sized businesses. Our experience has allowed us to build and develop the infrastructure needed to keep our prices affordable and our clients up and running.

get a free quote

Recent News

If you feel like you have too many browser tabs open at any given time, then you'll be happy to know that you can sometimes save certain browser tabs as a standalone application on your device. This will give them their own icon and make accessing th...

Contact Us

20178 96 Avenue, C400
Langley, British Columbia V1M 0B2

Mon to Fri 9:00am to 6:00pm

support@coleman.biz

(604) 513-9428

Coleman Technologies Inc Proud Member of

Image
Image
Image